Open the UI
The EagleEye web UI is served by the backend on port 5001.
1. Open it in a browser
On a laptop connected to the same network as the Pi:
http://<hostname>.local:5001
for example http://eagleeye.local:5001, or use the IP address:
http://10.33.22.11:5001. If you are working on the Pi itself with a browser,
http://localhost:5001 works too.
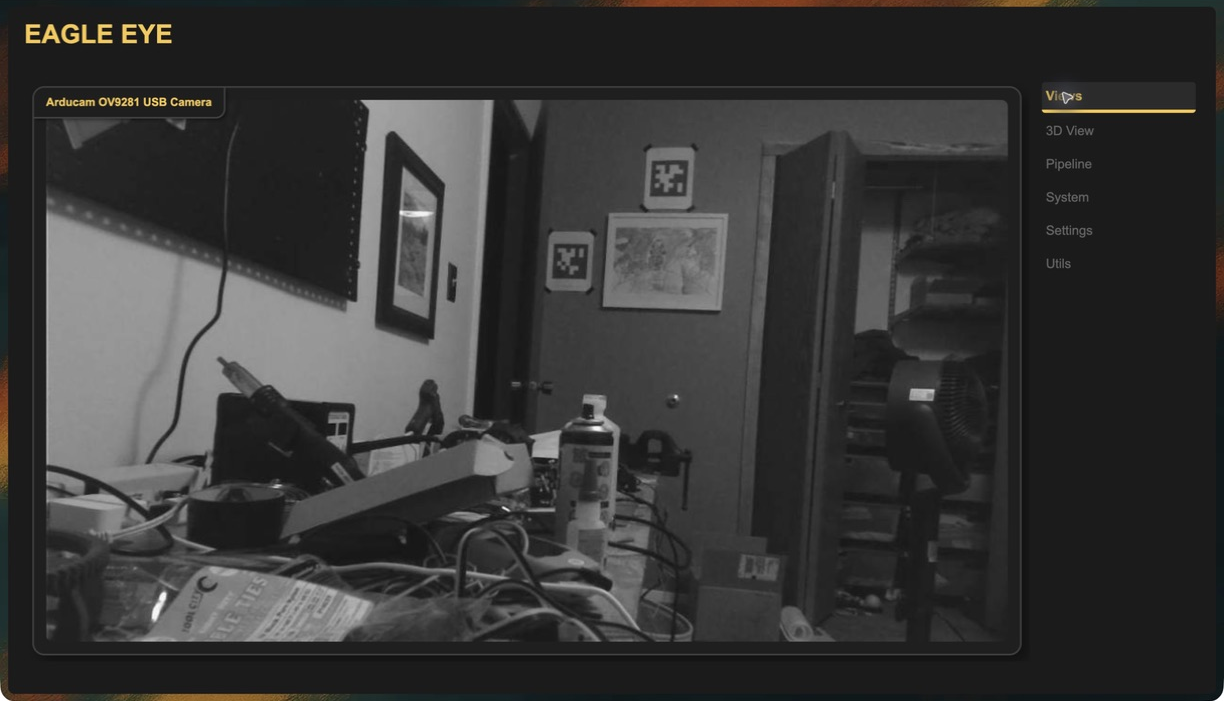
On a fresh installation with no pipelines and no completed or skipped setup, the UI opens the camera setup wizard. Its first screen is Name and configure your cameras, with a preview grid of detected cameras. Existing installations normally open Views, or the tab selected in the URL. A setup awaiting verification opens the checks over 3D View.
The navigation sidebar on the right lists Views, 3D View, Pipeline, System, Settings, and Utils.
2. Complete first-time camera setup
- Identify each camera from its preview. These are snapshots, not live video. Click Refresh previews after moving a camera or covering a lens.
- Enter a Placement description, such as
Front bumperorRear shelf, and click Save name on each card. See Check your cameras for naming details. - Click Configure for the first camera. This also saves an edited description on that card before leaving it.
- Follow the guide through intrinsics calibration and mounting extrinsics on the existing Utils page. Calibration must be saved before continuing; the mounting step saves the entered extrinsics.
- Choose Localize, Detect, or Both as the pipeline purpose. For robot pose estimation, choose Localize or Both. Detect-only requires a compatible CPU model; Both can leave its detection model slot empty until a model is available.
- Save the camera setup, then use Add another camera to repeat for the remaining cameras.
- Continue to NetworkTables, enter the roboRIO or simulation host address in Settings, and use the guide's Continue button to generate pipelines and restart EagleEye.
- Verify the result for the purpose you chose:
- For Localize or Both, in 3D View check the active pipeline and confirm the robot pose is correct. Check the pose and metadata publishers in NetworkTables, then follow Add EagleEye to robot code.
- For Detect, open Views or the pipeline live view and confirm that the expected detections appear. Detect-only does not publish a robot pose, so no pose or robot-code integration check is needed.
The wizard currently uses the bundled 2026 REBUILT AprilTag map. For another field, change that map in the generated pipeline and restart before trusting its pose. See Select or upload the field map.
If no cameras appear, connect them and restart the backend, then use Refresh cameras. You can choose Skip for now and reopen the wizard from Settings → General → Camera setup wizard → Open. To change only a camera's name later, use Settings → Camera Names; there is no need to generate pipelines again.
3. Confirm the backend is alive
Open the System tab. CPU, RAM, and storage numbers should update on their own every second or two — they stream from the backend, so movement means the connection is healthy.
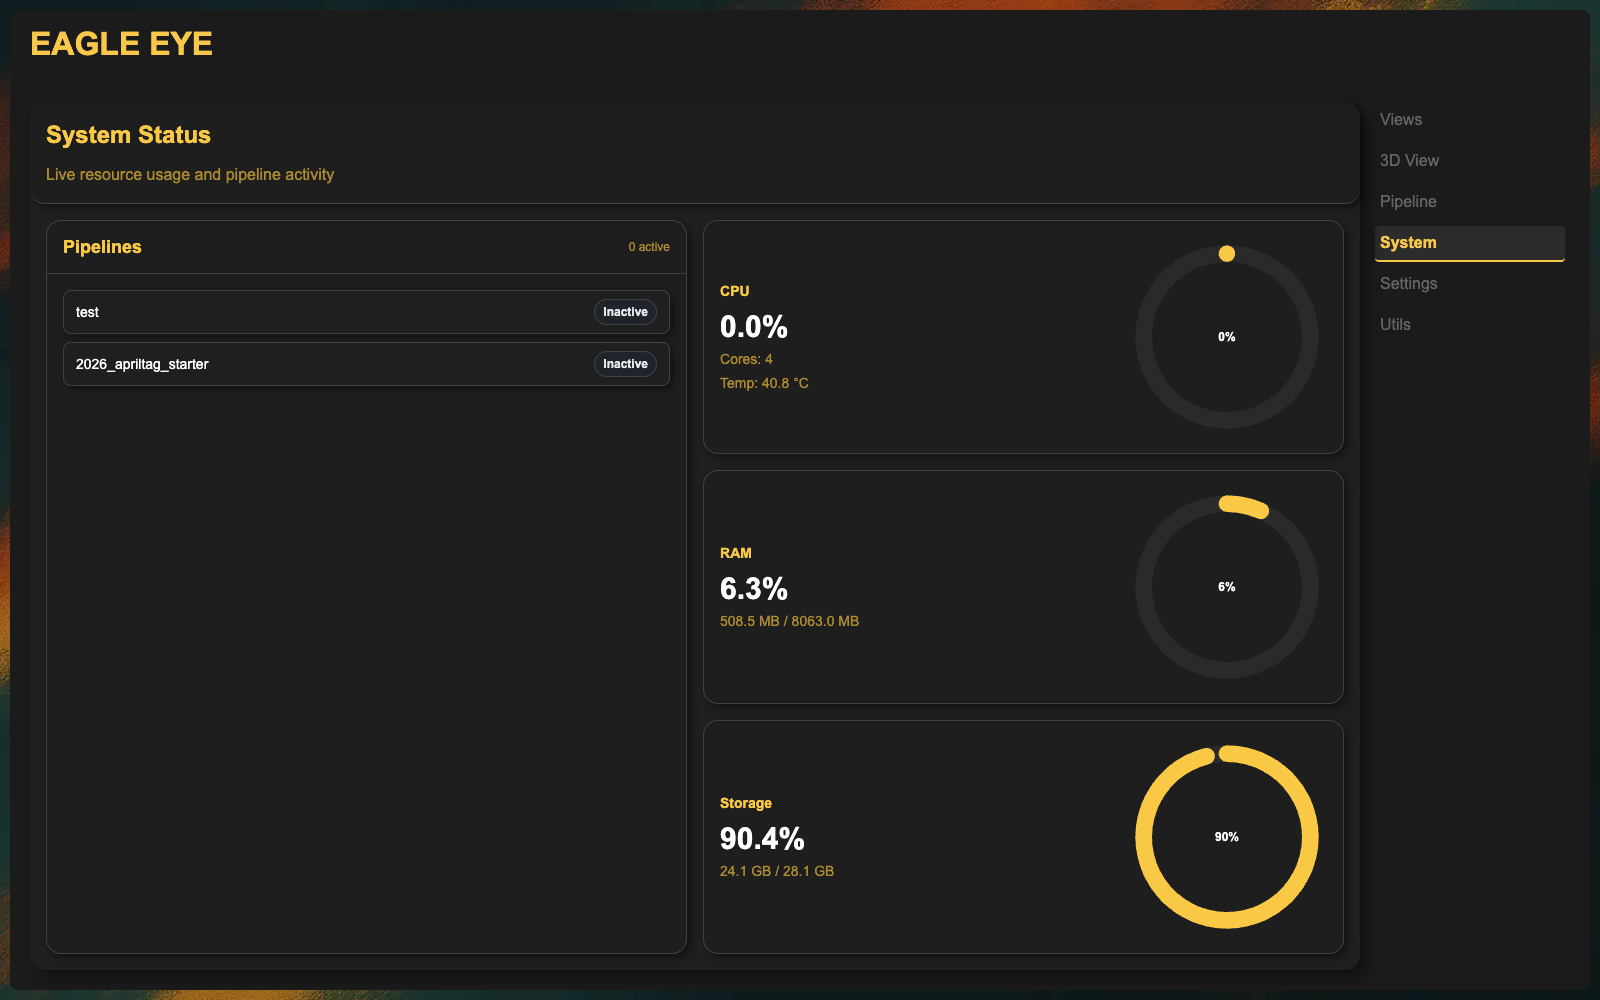
Expected result: metrics change over time and the pipeline list shows at least the pipelines in your config.
4. Look at the log once
Open the Settings tab and read the System Logs panel from the top. On a healthy first start you will see initialization lines, a list of detected inference devices, and camera detection lines.
Expected result: no repeating Traceback blocks.
If the page does not load
| Symptom | Check |
|---|---|
| Browser cannot connect | systemctl status eagleeye on the Pi; ss -tlnp | grep 5001 should show the port listening |
| Page loads but is blank | The web UI build may be missing — see Troubleshooting |
.local name fails | Use the IP address instead; mDNS is often blocked on event networks |
| Loads on the Pi but not from your laptop | Firewall or a different subnet — confirm both devices are on the same network |
Next: Check your cameras.
Setup instructions checked against EagleEye-Vision-System commit 94897ac on
feature/camera-naming-setup. Older builds may not include the camera naming grid.
The backend port is fixed at 5001.