Check Your Cameras
EagleEye finds USB cameras automatically at startup. Plug in the cameras and restart the backend. On a fresh install, identify them in the setup wizard's preview grid. On an existing install, the wizard does not open automatically after a restart. Reopen it from Settings → General → Camera setup wizard → Open, or identify cameras in Views. Give each camera a placement name and label its cable and USB port before continuing.
How cameras are identified
A placement description is a display name, such as Front bumper. EagleEye shows it in
the wizard, Views, camera configuration, and pipeline camera selectors. Cameras without a
saved description keep their hardware-derived names.
EagleEye stores the description and calibration against the camera's stable bus_id,
which identifies its physical USB path. Renaming does not change that ID, feed URLs,
calibration, pipeline names, or NetworkTables publisher keys. Robot code still subscribes
to the existing keys, not the placement description.
Keep each camera in the same USB port after setup. Moving it to another port changes its internal path, so its saved name and calibration may no longer match.
1. Plug in the cameras, then restart the backend
Cameras are detected during startup. After plugging in or unplugging anything:
sudo systemctl restart eagleeye
or open the Settings tab from the navigation on the right, then click Restart Backend at the bottom of the Backend Settings panel.
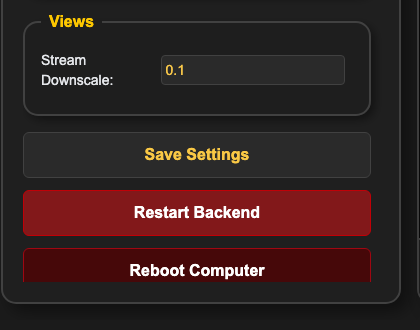
2. Name cameras in the setup wizard
The first screen of the first-time setup wizard shows the detected cameras in a preview grid.
- Look at each preview to identify the physical camera. If two cameras look alike, cover one lens and click Refresh previews.
- Enter a Placement description such as
Front bumper,Rear shelf, orIntake. - Click Save name on each card before configuring another camera.
- Click Configure to calibrate and enter mounting values for that camera. If its description has been edited, Configure saves it first. A failed save keeps you on the card.
Descriptions must contain 1 to 80 characters after trimming surrounding whitespace and cannot contain control characters. A successful save shows Name saved. No backend restart is needed for a name change. Use distinct descriptions so camera selectors are easy to read, even though the bus ID remains the actual identity.
The previews are small snapshots. Click Refresh previews for a new image; use Views when you need live video for aiming or focusing. Refresh cameras reloads the detected camera list, but does not discover newly plugged-in hardware without a backend restart.
Rename a camera later
Open Settings → Camera Names, edit the placement description, and click Save name. This uses the same preview and naming controls as the wizard. You do not need to repeat calibration, rerun the wizard, or change robot-code subscriptions.
Only active cameras appear in this editor. Reconnect a missing camera to its original port and restart the backend to rename it.
3. Check the Views tab
Open the Views tab. Every detected camera gets a live thumbnail card.
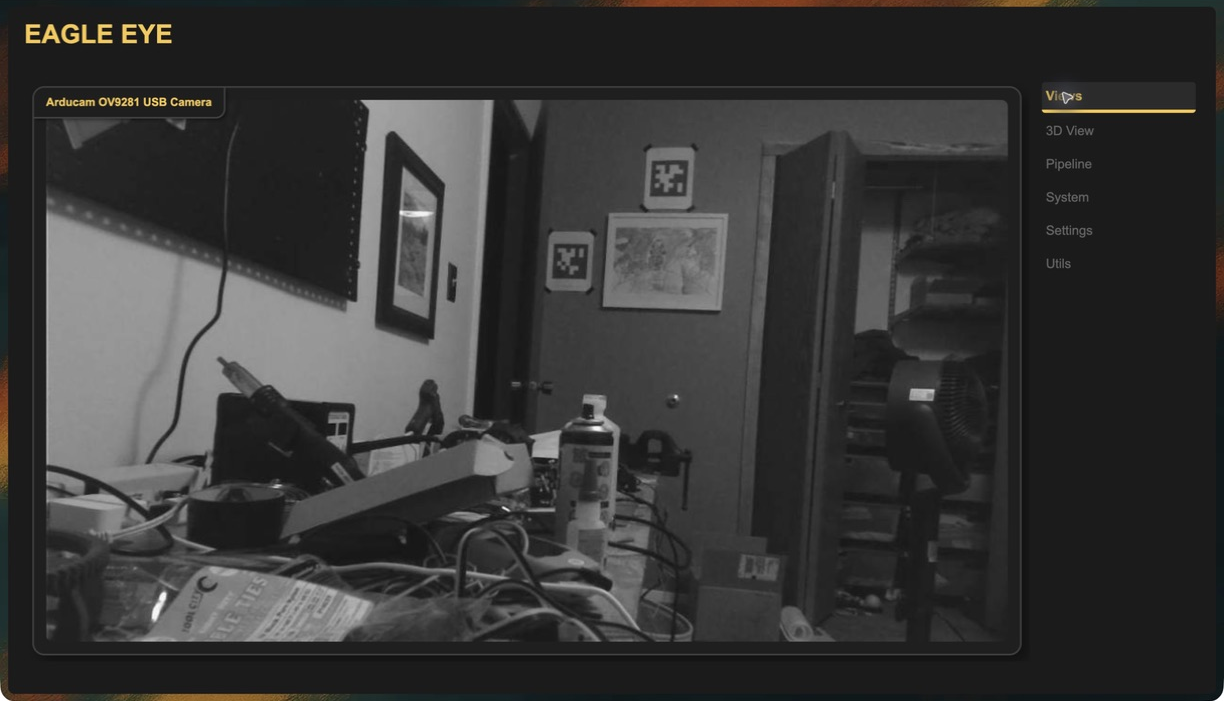
Expected result: one card per connected camera, each showing live video and labelled with the camera name. If you see the "no cameras" message, nothing was detected.
Views shows the raw camera stream, not pipeline output. It is meant for aiming the cameras and for driver assistance.
4. Match each camera to its physical port
Open the Utils tab and use the Camera dropdown at the top. It lists every camera EagleEye knows about. Select each camera and confirm which physical camera it represents, then label that camera's cable and Pi USB port.
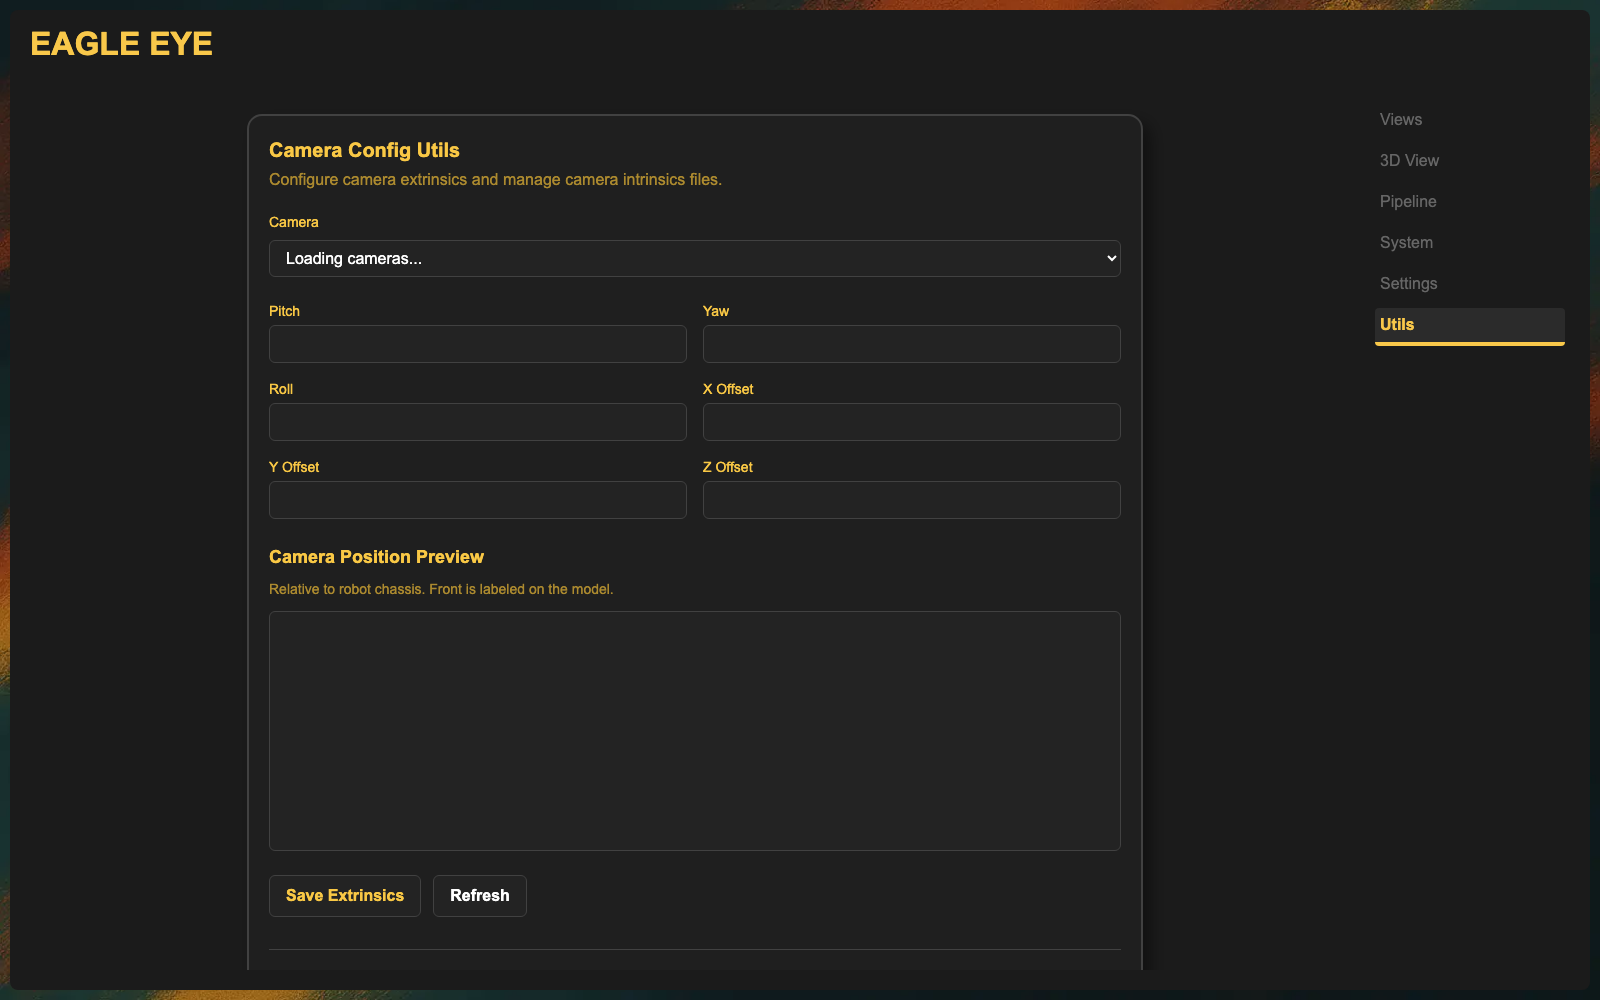
You should not need to inspect Linux device paths or look up bus IDs manually during normal setup. When an operation asks for a camera, use the camera identifier shown by the Web UI.
Camera selection
Use a UVC-compatible USB camera that Linux exposes through V4L2 and that can deliver MJPEG at your target resolution and frame rate. EagleEye does not yet publish a hardware-verified model list, so test the exact camera, cable, hub, and Pi port before standardizing your robot.
For AprilTags, prefer a global-shutter sensor. A rolling-shutter camera exposes image rows at different times, so fast robot rotation bends tag corners and degrades PnP even when the frame looks sharp. A global shutter captures the full frame at one instant. Manual exposure control and a fixed-focus lens are also useful under changing field light.
A common webcam can still work for development and low-speed testing. Treat it as unverified until you measure detection range and pose stability while driving and rotating at match speed.
5. Aim and focus
With the live view open, point each camera where it needs to look and check:
- The tags or targets you care about are in frame at the distances you care about.
- The image is in focus. Many cheap USB cameras have a manual focus ring.
- Exposure is not blowing out the tags under field lighting. A dark image with crisp tag edges beats a bright, smeared one.
Expected result: a sharp, correctly exposed image with your targets visible.
Troubleshooting
| Symptom | Likely cause | Fix |
|---|---|---|
| No cards in Views | Camera not detected at startup | Restart the backend after plugging it in; try another port or cable |
| Card present, black image | Camera opened but delivering no frames | Try a different USB port; some cameras need a powered hub |
| Old hardware name still shown | Placement description has not been saved | Enter a description and click Save name in Settings → Camera Names |
| Wizard or Settings preview is not moving | Preview is a snapshot | Click Refresh previews, or open Views for live video |
| Camera settings no longer match | Camera moved to another USB port | Put it back in its labelled port, or update that camera's settings |
| Two identical cameras confused | Same model, different ports | Cover one lens and watch which Views card goes dark |
Next: Calibrate intrinsics.
Camera naming instructions checked against EagleEye-Vision-System commit 94897ac on
feature/camera-naming-setup. Older builds may not include the camera naming grid.